In this post, I am going to show you how to make a graphic using Canva in just 4 (yes, 4) simple steps! Canva is a great tool to make banners, professional-looking invitations and ads, and I use it quite a lot. So, let's get into this tutorial!

There are many of these to pick from. I went for the blog graphic one. This is what it looks like. →
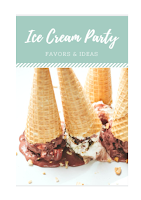 I picked the 'ice cream party' one, but there are many more free ones for you to pick from. You can then customise these.
You are done! Here is an example of my finished project:
 Step 1: Pick your template.
There are many of these to pick from. I went for the blog graphic one. This is what it looks like. →
Step 2: Now pick your design (the free ones).
 I picked the 'ice cream party' one, but there are many more free ones for you to pick from. You can then customise these.
Step 3: Add your text!
Next, you need to add your text! What are you trying to display? Write it in! The boxes are already created on the template. You can also change the colour and font of your text.
 Step 4: Put images/icons in.

After that, put some icons in. To do this, go to the menu on the side, and select elements. Then you can click on icons, and then simply pick your icon! (Make sure it's free, though, if you don't want to spend any money). To see if it is free, look in the right-hand corner.
You are done! Here is an example of my finished project:

So that was my tutorial on how to use Canva to make graphics. I hope you enjoyed reading it and make your own Canva project! Please show it in the comments! I would love to see it!

Comments
Post a Comment